How to activate an eSIM on Android?
First of all, you must check the following items in order to guarantee that you are able to successfully install and set up your eSIM:
- Your device is eSIM compatible and network unlocked. (see “What devices support eSIM?“+”How to check if my Android device support eSIM?“)
- You have a stable connection, preferably WiFi. (You need to download the eSIM properly to your device and a stable internet connection is a must.)
There are 2 ways to add an eSIM to your device:
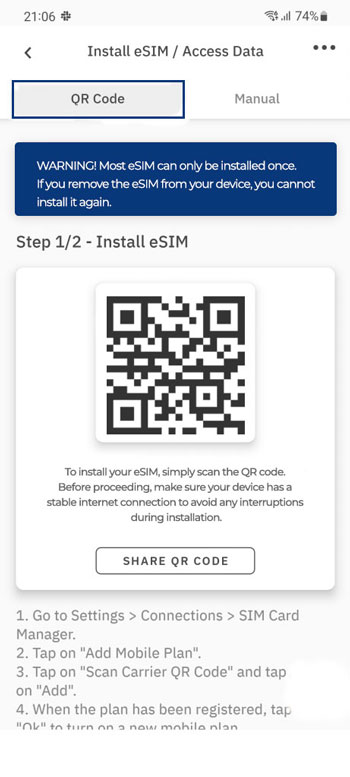
- By scanning the QR Code from the “QR code” tab
- By adding the installation details manually from the “Manual” tab
This article will guide you through both QR code and Manual methods.
Option 1: By scanning the QR code
1. Choose the “QR Code” tab at the top
(You may select the share QR button for sharing it with another device).
2. Go to Settings on your device
3. Tap on Network & Internet
4. Tap the Add or + icon next to Mobile Network
5. Tap Next when asked, “Don’t have a SIM card?”
6. Scan your QR code and add the confirmation code if prompted
7. Go back to your “Install eSIM/Access Data” screen.
8. Turn on eSIM under Mobile Network
9. Enable Mobile Data
10. Enable Data Roaming (Please turn off your primary line to avoid roaming charges from your carrier provider when overseas)
11. Go to Network & Internet and tap on the Mobile network to set the correct network preferences listed in the Additional Info which is at the bottom-right of the selected data package page.
12. Set up an APN(access point name) on your device if required.
Option 2: By adding the details manually
If you are experiencing issues scanning the QR code or are unable to scan the QR code, you can enter eSIM details manually. Please follow these steps:
To add and set up your eSIM via the manual method, please follow these steps:
1. Choose the “Manual” tab at the top
2. Copy the “SM-DP+Address & Activation Code” (manual installation information)
3. Tap on Network & Internet
4. Tap the Add or + icon next to Mobile Network
5. Tap Next when asked, “Don’t have a SIM card?”
6. Tap Enter Code Manually. You will be asked to enter your SM-DP+Adress as shared on your eSIM installation page.
7. Turn on your eSIM under Mobile Network
8. Enable Mobile data
9. Enable Data Roaming (Please turn off your primary line to avoid roaming charges from your carrier provider when overseas)
10. Set up an APN(access point name) on your device if required. Important Tip
Once the eSIM has been installed either via QR code or Manual method, you can easily complete the steps for accessing data through the shortcuts to your device’s screens by tapping the “SETTINGS” buttons from your “Access data steps”.